Ready for Lasting Smoothness: What is At-Home Laser Waxing?
Ready for lasting smoothness? Imagine the convenience of waxing that slowly turns into permanent hair reduction — done from your bathroom, on your schedule.
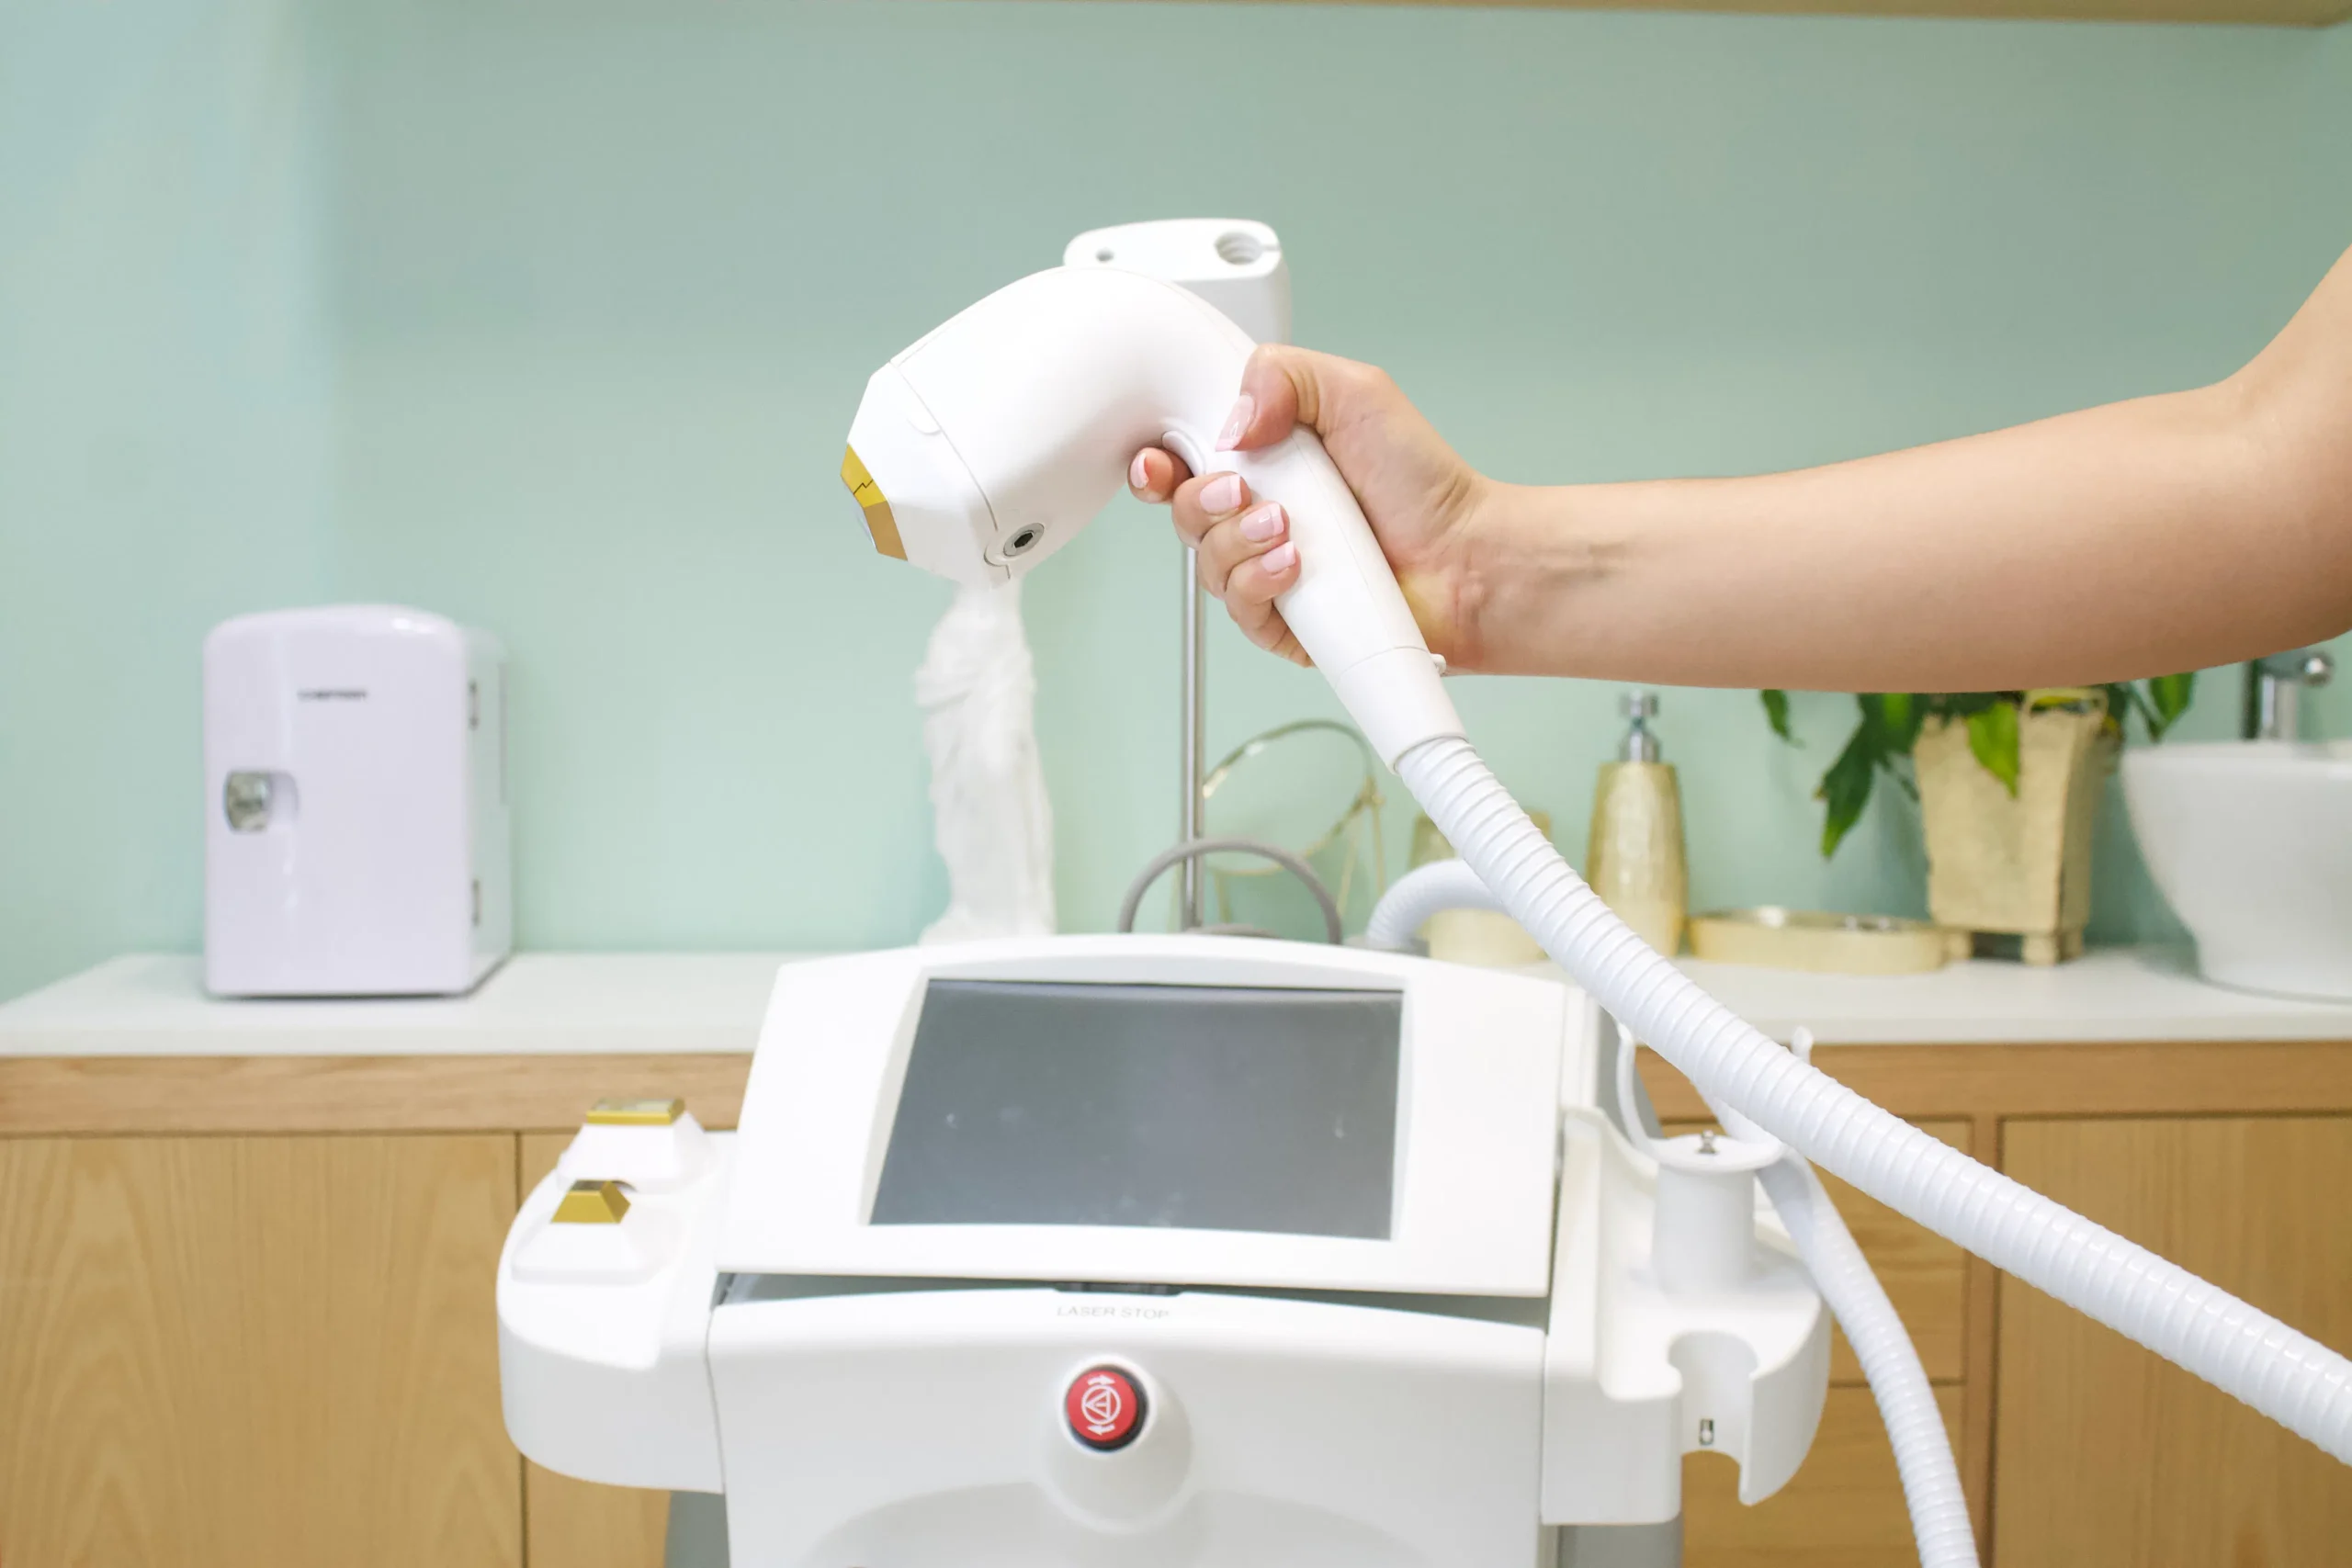
What is at-home laser waxing?
At-home laser waxing is the consumer-friendly evolution of clinic lasers: compact devices (usually IPL or diode-based) deliver light pulses that target hair follicles, reducing regrowth over repeated sessions. It sits between traditional waxing and professional laser treatments — faster than shaving, longer-lasting than waxing, and far less costly per session than clinic visits.
Industry signals back this shift: the global hair removal market is projected to reach $4.2 billion by 2026, and professional laser approaches report 80–90% satisfaction after a full course. At-home devices aim to bring a slice of that effectiveness into everyday life.
At-home laser waxing is about gradual, cumulative reduction — not a one-shot fix.
Core benefits and why it matters
- Longer intervals between treatments compared with shaving and waxing.
- Reduced hair density and finer regrowth with consistent use.
- Lower long-term spend vs. repeated professional sessions, though results take time.
- Convenience and privacy: perform sessions on your schedule.
It’s important to temper expectations: common side effects like temporary redness or mild swelling occur, typically subsiding within 24 hours. Device performance depends on hair colour, skin tone, and following safety instructions.
Micro-summary: At-home laser waxing combines the convenience of consumer devices with the long-term intent of clinical lasers to deliver lasting smooth skin when used consistently.
A quick safety scaffold
Prepare by shaving (not waxing) before treatment, avoid recent sun exposure, and always perform a test patch. Follow device manuals closely and choose settings appropriate to your skin/hair type.
For clinic-grade guidance and complementary treatments that speed comfort and results, explore our professional laser hair removal services and read about laser waxing benefits to compare options.
Micro-summary: Safety and patience are the twin pillars — prepare properly, follow instructions, and expect progressive improvement toward lasting smooth skin.
Why Choose At-Home Laser Waxing Over Other Hair Removal Methods?
Which trade-off matters most: instant smoothness or lasting results? The answer usually determines the method you choose — and why at-home laser waxing is worth considering.
Shaving wins for speed but loses for duration. Hair is cut at the surface and typically returns within days. Waxing pulls hair from the root and can keep skin smooth for 3–6 weeks, but regrowth returns and density remains unchanged. Professional lasers promise the best route to permanent hair reduction, yet sessions cost $200–$800 each and require clinic visits.
At-home laser waxing sits squarely between these extremes: it targets follicles like clinic lasers, uses IPL or diode technology adapted for safety at home, and gradually reduces regrowth with repeated treatments. It delivers longer intervals of smoothness than shaving or waxing while avoiding the recurring clinic bill.
Three pillars that set at-home laser waxing apart:
- Longevity: repeated treatments produce meaningful reduction in hair density over months, approaching the 80–90% satisfaction rates reported for complete laser treatment plans. This is the core promise of permanent hair removal trends.
- Convenience: treatments on your schedule, no appointments, and less downtime than waxing. Modern devices and apps help guide sessions and track progress.
- Effectiveness & comfort: lower-power diode/IPL for home use reduces risk when used correctly, and many devices include safety features that minimize redness and swelling—side effects that typically subside within 24 hours.
When to prefer other methods: choose shaving for the lowest upfront cost and instant fixes; choose salon waxing for a polished, immediate result; choose professional laser for faster, higher-powered permanent hair reduction if budget allows.
If you’re weighing options, consider device lifespan, the learning curve for safe use, and your skin/hair type. For a deeper clinic-versus-home comparison and tips to maximize results, see our guide on laser waxing.
At Amsterdam Beauty Clinic we combine advanced technology and vegan products across services including laser hair removal — whether you choose a home device or professional care, informed choices deliver the smoothest, longest-lasting results.
In short: at-home laser waxing offers a pragmatic middle path — significantly longer-lasting smooth skin than shaving or waxing, with greater convenience and a strong path toward permanent hair reduction when used consistently.
How to Safely and Effectively Prepare for Your At-Home Laser Waxing Session?

Photo by Anna Shvets on Pexels
Know if at-home laser is right for you
Not every skin and hair combination responds the same to at-home hair reduction. Intense Pulsed Light (IPL) and diode devices work best on lighter skin with darker hair; darker skin tones or light/red hair may need professional assessment. If you’re on photosensitizing medication, pregnant, or have active skin infections, stop and consult your clinician. For questions about professional options, see Amsterdam Beauty Clinic’s laser hair removal.
Use the PREP framework — a four-step routine before every session
- Patch: Perform a small test patch on the intended area and observe for 24–48 hours for redness, blistering, or prolonged irritation. Never skip this.
- Remove surface hair: Shave the treatment area 12–24 hours before the session so the energy targets the follicle, not surface hair. Do not wax, pluck, or epilate for 4–6 weeks prior — those remove the follicle and reduce effectiveness.
- Environment: Choose a clean, well-lit space with a flat surface and plug in the device nearby. Keep cooling gel, a cold pack, and a mirror within reach.
- Protect the skin: Avoid sun exposure and self-tanning for at least two weeks before treatment. Stop topical retinoids, exfoliating acids, or chemical peels for 7 days prior.
Start low and progress: always begin at the device’s lowest effective setting and increase only if your test patch tolerated it.
This PREP framework reduces risk and increases efficacy by ensuring the device targets follicles safely.
Day-of checklist for a safe at-home laser session
- Clean, dry skin: no lotions, oils, deodorants, or makeup.
- Shave if you haven’t already.
- Confirm skin tone/hair color setting per your device manual.
- Wear protective eyewear if the manufacturer requires it; follow the manual exactly.
- Keep sessions spaced as recommended (usually 4–8 weeks) to match hair growth cycles.
Final safety reminders
Common short-term effects include redness and mild swelling that usually subside within 24 hours. If you see intense pain, blistering, or pigment changes, stop treatment and seek professional care. When in doubt, consult a clinic experienced with both professional and at-home protocols.
Use a test patch, follow the PREP framework, read your manual closely, and prioritize skin safety — that’s how safe at-home laser sessions become effective ones.
Can You Master At-Home Laser Waxing: A Step-by-Step Guide for Flawless Results?
Start with a short reality check: at-home devices can deliver meaningful hair reduction, but technique and patience determine whether you get salon-grade results or a frustrating patchy outcome. I write this as a practitioner who trains clients on device technique at Amsterdam Beauty Clinic—so these steps reflect both clinical caution and real-world tips.
Quick safety checklist before you begin
- Do a patch test 48 hours before full use.
- Avoid tanning and sun exposure for 2 weeks before and after treatment.
- Stop photosensitising medications (retinoids, certain antibiotics) as advised by your clinician.
- Do not treat moles, tattoos, broken skin, or areas with active infection.
Safety first: if you have doubts about skin conditions or medications, consult a professional.
Micro-summary: Confirm clearance, patch-test, and sun-safety before any at-home hair reduction session.
Step-by-step: the treatment workflow
-
Prepare the area. Cleanse gently and shave the treatment zone close to the skin—laser devices target follicle pigment, not surface hair. For bikini laser waxing, trim instead of waxing; never wax before using the device.
-
Position and protect. Put on any supplied goggles if the device requires them. Make sure the skin is dry and free of oils or creams.
-
Select your mode. Most at-home systems use IPL (Intense Pulsed Light) or diode lasers. Choose a conservative energy level for your first session. If your device has skin-tone sensors, rely on them.
-
Do a patch test. Treat a small, discreet area and wait 24–48 hours for redness or blistering. If there’s excessive reaction, do not proceed.
-
Map the area. Work systematically in a grid pattern: stamp or glide in adjacent, non-overlapping passes according to the device’s window size. Overlap causes unnecessary heat and irritation.
-
Maintain contact. Keep full contact and perpendicular placement on the skin; flashes that miss contact waste pulses and reduce effectiveness.
-
Track pulses and comfort. Note how many pulses you use per zone and the sensation level. Slight warmth and tingling are normal; sharp pain or burning is a sign to stop.
-
Cool and soothe. Apply a cool compress or an approved post-treatment gel if the skin feels warm.
Consistency beats intensity: regular, correctly spaced sessions produce better long-term results than cranking power once.
Micro-summary: Treat in clean, shaved skin with systematic, non-overlapping passes; begin low, test, then adjust.
Frequency, expectations, and aftercare
- Typical schedule: every 2–6 weeks depending on the device and hair growth cycle.
- Expect gradual reduction: most users see visible thinning after 3–6 sessions and optimal results after 8–12 sessions.
- Aftercare: avoid sun, use a gentle moisturizer, and exfoliate after a few days to reduce ingrown hairs.
If you’re unsure about bikini laser waxing or treating sensitive zones, consider a hybrid approach: home maintenance between professional sessions. For details on clinic options and advanced treatments, Amsterdam Beauty Clinic recommends reviewing our guidance on getting started with laser waxing and exploring professional laser hair removal services.
- getting started with laser waxing: https://amsterdambeautyclinic.nl/getting-started-with-laser-waxing-your-guide-to-lasting-smooth-skin-in-2025/
- laser hair removal: https://amsterdambeautyclinic.nl/all-services/
Micro-summary: Expect gradual progress, protect skin post-treatment, and lean on professionals for sensitive areas or unexpected reactions.
Mastery comes from safe repetition: treat, observe, adapt. Follow the device manual, respect your skin, and you’ll make at-home hair reduction a reliable part of your routine.
What are the Expert Tips and Aftercare Secrets for Maintaining Silky Smooth Skin?

Immediate aftercare: the first 48 hours matter most
Treat the first two days like recovery from a minor procedure — because, in effect, it is. Cool compresses, clean hands, and fragrance-free sootheers reduce redness and swelling after at-home laser waxing or combined laser-wax sessions. Avoid hot showers, saunas, intense exercise, and chlorinated pools for 48 hours to prevent prolonged irritation.
- Gently cleanse with lukewarm water and a mild, soap-free cleanser.
- Apply a cooling gel (aloe vera or a vegan post-procedure gel) and reapply as needed.
- Use a physical barrier (loose clothing) to prevent friction.
If you see prolonged redness, blistering, or increased pain, stop treatments and consult a professional.
Immediate-care micro-summary: act fast, stay cool, and keep the treated area clean to limit inflammation and set the stage for lasting smooth skin.
Maintenance protocol: weekly and ongoing habits for lasting smooth skin
Long-term results hinge on consistency and prevention. Follow this CARE framework: Cleanse, Avoid, Rehydrate, Exfoliate.
- Cleanse: Use gentle, non-comedogenic cleansers daily.
- Avoid: No aggressive exfoliants for 48–72 hours post-treatment; skip peels or retinoids for a week after sessions.
- Rehydrate: Lightweight, fragrance-free moisturizers and daily SPF 30+ protect healing skin and prevent pigmentation.
- Exfoliate: Start gentle exfoliation (chemical exfoliant like 2% salicylic acid) 3–7 days after treatment to prevent ingrown hairs — no harsh scrubs.
Also, avoid waxing or plucking between laser sessions; at-home hair reduction works by targeting follicles, so plucking removes the target. Shaving is acceptable when necessary but keep razors clean and use soothing aftercare.
Consistent, gentle care beats aggressive ‘quick fixes’ every time.
Maintenance micro-summary: a predictable, gentle routine and sun protection prolong results and reduce complications.
For professional advice or advanced aftercare products, Amsterdam Beauty Clinic combines state-of-the-art treatments with natural, vegan post-care options — and if you want in-person guidance on maintaining silky results, start with local recommendations like waxing Amsterdam.
Smooth skin secrets: protect, hydrate, and stay consistent — that’s the shortest path to lasting smooth skin after at-home hair reduction.
Facing a Snag? How Can You Troubleshoot Common At-Home Laser Waxing Challenges?
Even with the most meticulous approach to your safe at-home laser routine, minor hiccups can occasionally arise. Don’t let them derail your journey to lasting smoothness! The key is to swiftly diagnose the issue and respond with confidence. Let’s explore the most common challenges you might encounter, along with practical solutions and clear guidance on when it’s time to consult an expert.
Common Issues and Practical Fixes for Your At-Home Laser
-
Redness, Burning, or Prolonged Swelling: Experiencing some redness, a mild burning sensation, or prolonged swelling after your at-home laser session? This can be concerning, but often has a simple remedy. Immediately apply a clean, cool compress to the affected area for 10–15 minutes. For the next 24–48 hours, avoid hot showers, saunas, or anything that might further irritate the skin. Follow up with a gentle, fragrance-free moisturizer to soothe and hydrate. Crucially, if you notice any blistering, severe pain, or if symptoms worsen rather than improve, cease all treatments immediately and consult a qualified clinician. Your skin’s health is paramount.
-
Uneven Results or Missed Hairs: Are you noticing frustratingly uneven results or stubborn missed hairs? This is a common hurdle in your laser waxing guide journey, often stemming from technique. First, confirm you’re shaving (not waxing or plucking) the treatment area immediately before your session; the laser needs the hair follicle intact to be effective. Ensure your device is held flat and steady against the skin, maintaining optimal contact. To prevent patchy results, consciously avoid both overlapping areas too much (which can cause irritation) and skipping sections. Many users find it helpful to track treated zones on a mirror or by using light, temporary grid markings on the skin to ensure comprehensive coverage.
-
Device Won’t Fire or Flashes Inconsistently: If your at-home laser device isn’t firing or flashes inconsistently, it’s usually a technical, not a skin, issue. Start by thoroughly cleaning the contact window – any residue can interfere with the sensor. Next, verify that the batteries are fully charged or the device is properly plugged in. Most importantly, always refer to your device’s manual to confirm your skin tone and hair color compatibility; many devices have built-in safety features that prevent firing on unsuitable skin types or hair colors. If these steps don’t resolve the issue, the best course of action is to contact the manufacturer’s support for specialized assistance.
-
Unexpected Pain or Sensitivity: Experiencing unexpected pain or heightened sensitivity during your treatment? This is a clear signal to adjust your approach. Immediately lower the energy setting on your device; sometimes even a slight reduction can make a significant difference. Before proceeding with further treatments, perform a new patch test on a less visible area, waiting at least 48 hours to observe any reaction. Remember, patience is key with hair removal methods like laser; waiting at least 48 hours between sessions allows your skin to fully recover. If sensitivity persists despite these adjustments, pause treatments entirely and seek professional advice.
-
Ingrown Hairs or Folliculitis: While laser waxing guide treatments significantly reduce hair, occasional ingrown hairs or folliculitis (inflamed hair follicles) can still occur. Once the initial healing window has passed (typically 24–48 hours post-treatment), gently exfoliate the area 2–3 times a week to help prevent hairs from becoming trapped. Always follow with a non-comedogenic moisturizer to keep skin hydrated without clogging pores. If inflammation becomes noticeable, a single application of a topical antiseptic can help manage the area, but avoid harsh chemicals or excessive scrubbing.
Remember: Your skin is unique. Always prioritize a patch test before increasing intensity or treating a new area. This simple step is your best defense against adverse reactions and ensures a safe at-home laser experience.
The REPAIR Framework for Decisive Troubleshooting
To help you navigate any challenges with confidence and maintain your safe at-home laser routine, consider our simple REPAIR framework for decisive troubleshooting:
- Read the manual and safety checks thoroughly.
- Examine skin and device condition for any anomalies.
- Patch test at lower settings to assess skin reaction.
- Adjust technique (contact, speed, overlap) for optimal results.
- Investigate aftercare and Rest skin if needed.
If, despite your best efforts with this laser waxing guide, you’re still unsure about your results or experiencing persistent issues, remember that expert guidance is always available. Consider a consult at Amsterdam Beauty Clinic. Their team, experienced in advanced, minimally discomforting treatments, can help you compare your at-home device experience with professional laser hair removal options and refine your long-term plan for lasting smoothness. Often, small adjustments are all it takes to restore your progress, but for persistent problems or any lingering doubts, expert evaluation is invaluable for your peace of mind and skin health.
Is At-Home Laser Waxing a Cost-Effective Path to Permanent Hair Reduction?

Photo by Kamaji Ogino on Pexels
Is at-home laser waxing truly a worthwhile investment for lasting smoothness? The answer, for many, is a resounding yes—but understanding the financial nuances and setting realistic expectations is crucial.
The Financial Equation: Upfront Cost vs. Lifetime Value
The initial appeal of at-home devices is clear: a single purchase grants you the freedom to treat repeatedly, dramatically lowering the barrier to entry for effective at-home hair reduction. This stands in stark contrast to professional laser hair removal sessions, which typically range from €200 to €800 per visit, depending on the treatment area and clinic.
Considering the impressive 80–90% global satisfaction rate for laser treatments after a full course, the primary trade-off becomes evident: you gain convenience and a lower upfront laser treatment cost at home, balanced against the speed and clinical oversight of a professional setting. Indeed, a one-time device purchase can quickly become a highly cost-effective solution if you commit to a consistent treatment schedule and the device offers a robust lifespan.
Key Variables to Consider
However, several key variables influence the true long-term value of your at-home laser waxing journey. Consider these factors before making your decision:
- Device Longevity & Warranty: Does the device require expensive replacement cartridges? A longer lifespan and comprehensive warranty significantly enhance its overall value.
- Treatment Duration: Expect several months of consistent sessions before achieving noticeable hair reduction. Patience is a virtue in this process.
- Treated Area Size: For smaller, targeted areas like the upper lip or underarms, at-home devices offer substantial savings. For full-body hair reduction, the efficiency and power of a clinic might still be more appealing.
- Skin & Hair Suitability: Professional devices often boast greater power and versatility, making them more effective for a wider range of skin tones and hair colors. Always check device compatibility for optimal results.
When At-Home Hair Reduction Becomes Your Smartest Investment
So, when does at-home hair reduction truly make financial and practical sense? It shines particularly bright for individuals who possess:
- Smaller, Defined Target Areas: Ideal for specific zones rather than extensive body coverage.
- Consistent Schedule Discipline: The commitment to regular, self-administered sessions is paramount for achieving desired results.
- Compatible Skin & Hair Type: Ensuring your device is suited to your unique physiological characteristics is key to effectiveness and safety.
Embracing at-home laser waxing offers significant laser waxing benefits, including reduced long-term shaving and traditional waxing costs, coupled with unparalleled privacy and convenience. To further understand how to minimize traditional waxing expenses and achieve lasting smoothness, explore Amsterdam’s Best Kept Secrets for Flawless Waxing in 2026.
However, if your goal is faster, clinically monitored progress toward permanent hair removal, or if you have complex skin considerations, professional laser hair removal plans might prove more cost-effective over many sessions. For many clients, a hybrid approach often yields the best results. Consider starting with a professional clinic consultation to confirm your candidacy and establish an initial treatment plan. Subsequently, you can seamlessly transition to an at-home device for touch-ups and maintenance, maximizing both efficacy and savings.
For an expert clinic option and to compare professional pricing and packages, consult Amsterdam Beauty Clinic’s laser hair removal services. Their specialists can guide you toward the optimal path for your unique needs.
Ready to embrace long-lasting smoothness? Explore advanced beauty treatments and expert hair removal solutions at Amsterdam Beauty Clinic.
People Also Ask
What is the difference between laser waxing and traditional laser hair removal?
Laser waxing combines the convenience of at-home application with the principles of professional laser hair removal. While traditional laser hair removal is performed by trained professionals in a clinic setting, at-home laser waxing uses devices designed for home use to target hair follicles for long-term reduction. The goal is similar: to achieve smoother skin with less frequent hair growth.
How long does it take to see results from at-home laser waxing?
Results vary depending on individual hair growth cycles and skin type, but most users start noticing reduced hair density within a few weeks of consistent treatment. For significant, lasting smooth skin, a full course of treatments is typically recommended, often spanning several months. Patience and adherence to the treatment schedule are key.
Is at-home laser waxing safe for all skin tones?
Many at-home laser devices are designed to be safe for a range of skin tones, but it’s crucial to check the device’s specifications. Devices that use IPL (Intense Pulsed Light) technology are generally more versatile. Always perform a patch test on a small area of skin before treating larger areas to ensure no adverse reactions occur.
Can I use at-home laser waxing on sensitive areas like the bikini line?
Yes, at-home laser waxing can be used on sensitive areas, including the bikini line, but extra caution is advised. Ensure the device is suitable for this area and always follow the manufacturer’s instructions carefully. Start with a lower intensity setting if available and perform a patch test first.
What should I do if I experience redness or irritation after at-home laser waxing?
Mild redness or irritation is normal immediately after treatment. Soothe the skin with a cool compress or aloe vera gel. Avoid sun exposure, hot showers, and harsh skincare products for at least 24-48 hours. If irritation persists or is severe, discontinue use and consult a professional, or consider services like those offered at Amsterdam Beauty Clinic for expert advice.
Is at-home laser waxing truly permanent hair reduction?
At-home laser waxing aims for long-term hair reduction rather than complete permanent removal. It significantly reduces hair density and growth over time, leading to much smoother skin. Periodic maintenance treatments may be necessary to maintain results, especially for individuals with naturally coarse or dark hair.