Why Consider Laser Waxing at Home for Lasting Smoothness?
If you want freedom from frequent shaving and salon appointments, at-home laser waxing is the modern alternative that delivers measurable long-term change. I’ve seen this shift firsthand at Amsterdam Beauty Clinic: clients who choose at-home devices are chasing convenience, cost savings, and a path toward permanent hair removal without sacrificing safety when done correctly.
The promise is practical: clinical studies report up to 90% hair reduction after multiple sessions, and the market for at-home devices is growing rapidly as technology improves. The U.S. Food and Drug Administration (FDA) has cleared several consumer-grade units, and newer models include skin-tone sensors and cooling features that reduce discomfort.
Who this guide is for
- Busy professionals who want consistent, salon-quality results on their schedule.
- People evaluating whether DIY hair reduction can become a long-term solution.
- Anyone seeking reliable smooth skin solutions who prefers privacy and lower per-session costs.
What you’ll achieve by following this guide
- A clear, step-by-step routine for safe, effective sessions at home.
- Practical prep and aftercare that reduce side effects like redness or discoloration.
- A realistic timeline for permanent hair removal and how to measure progress.
Why this skill matters now
Professional treatments typically cost $200–$400 per session; at-home devices cost a fraction long-term. When paired with correct technique and device choice, laser waxing at home becomes a strategic investment in both time and skin health.
Practical confidence beats guesswork: with the right device and routine, you can achieve salon-caliber smoothness at home.
Micro-summary: This section sets expectations—who benefits, what you’ll learn, and why at-home laser waxing is a viable route to lasting smooth skin.
For clinical-grade context and professional backup, explore our services and when in-clinic care is recommended at Amsterdam Beauty Clinic, or read our detailed laser waxing guide before you start. For device and treatment options, see our laser hair removal offerings.
What Essential Steps Must You Take Before Your At-Home Laser Session?
Essential Preparations for Your At-Home Laser Session
Before embarking on your journey to lasting smooth skin with at-home laser hair removal, a meticulous approach is non-negotiable. Treat each session with the diligence of a medical-grade procedure to maximize efficacy while safeguarding your skin from irritation and risk.
Your first, and most critical, step in how to laser wax safely at home is selecting an FDA-cleared device. The Food and Drug Administration (FDA) has rigorously tested and approved several at-home systems for both safety and efficacy. Choosing one of these approved devices provides a foundational assurance for your DIY laser waxing experience. Always adhere strictly to the manufacturer’s manual, as each device has specific operating instructions.
Assessing Your Skin and Hair for Optimal Results
Not all skin and hair combinations are ideal candidates for at-home laser hair removal. These devices perform most effectively on darker hair and lighter to medium skin tones. The laser targets pigment in the hair follicle, making darker hair easier to treat. If you have darker skin, recent sun exposure or tanning, or very light, fine vellus hair, it is crucial to consult a dermatologist before proceeding. This expert advice helps prevent potential irritation, pigmentation changes, and ensures you achieve effective results.
Your Step-by-Step Pre-Treatment Checklist
Thorough preparation is key to a successful at-home laser hair removal session. Follow these steps diligently:
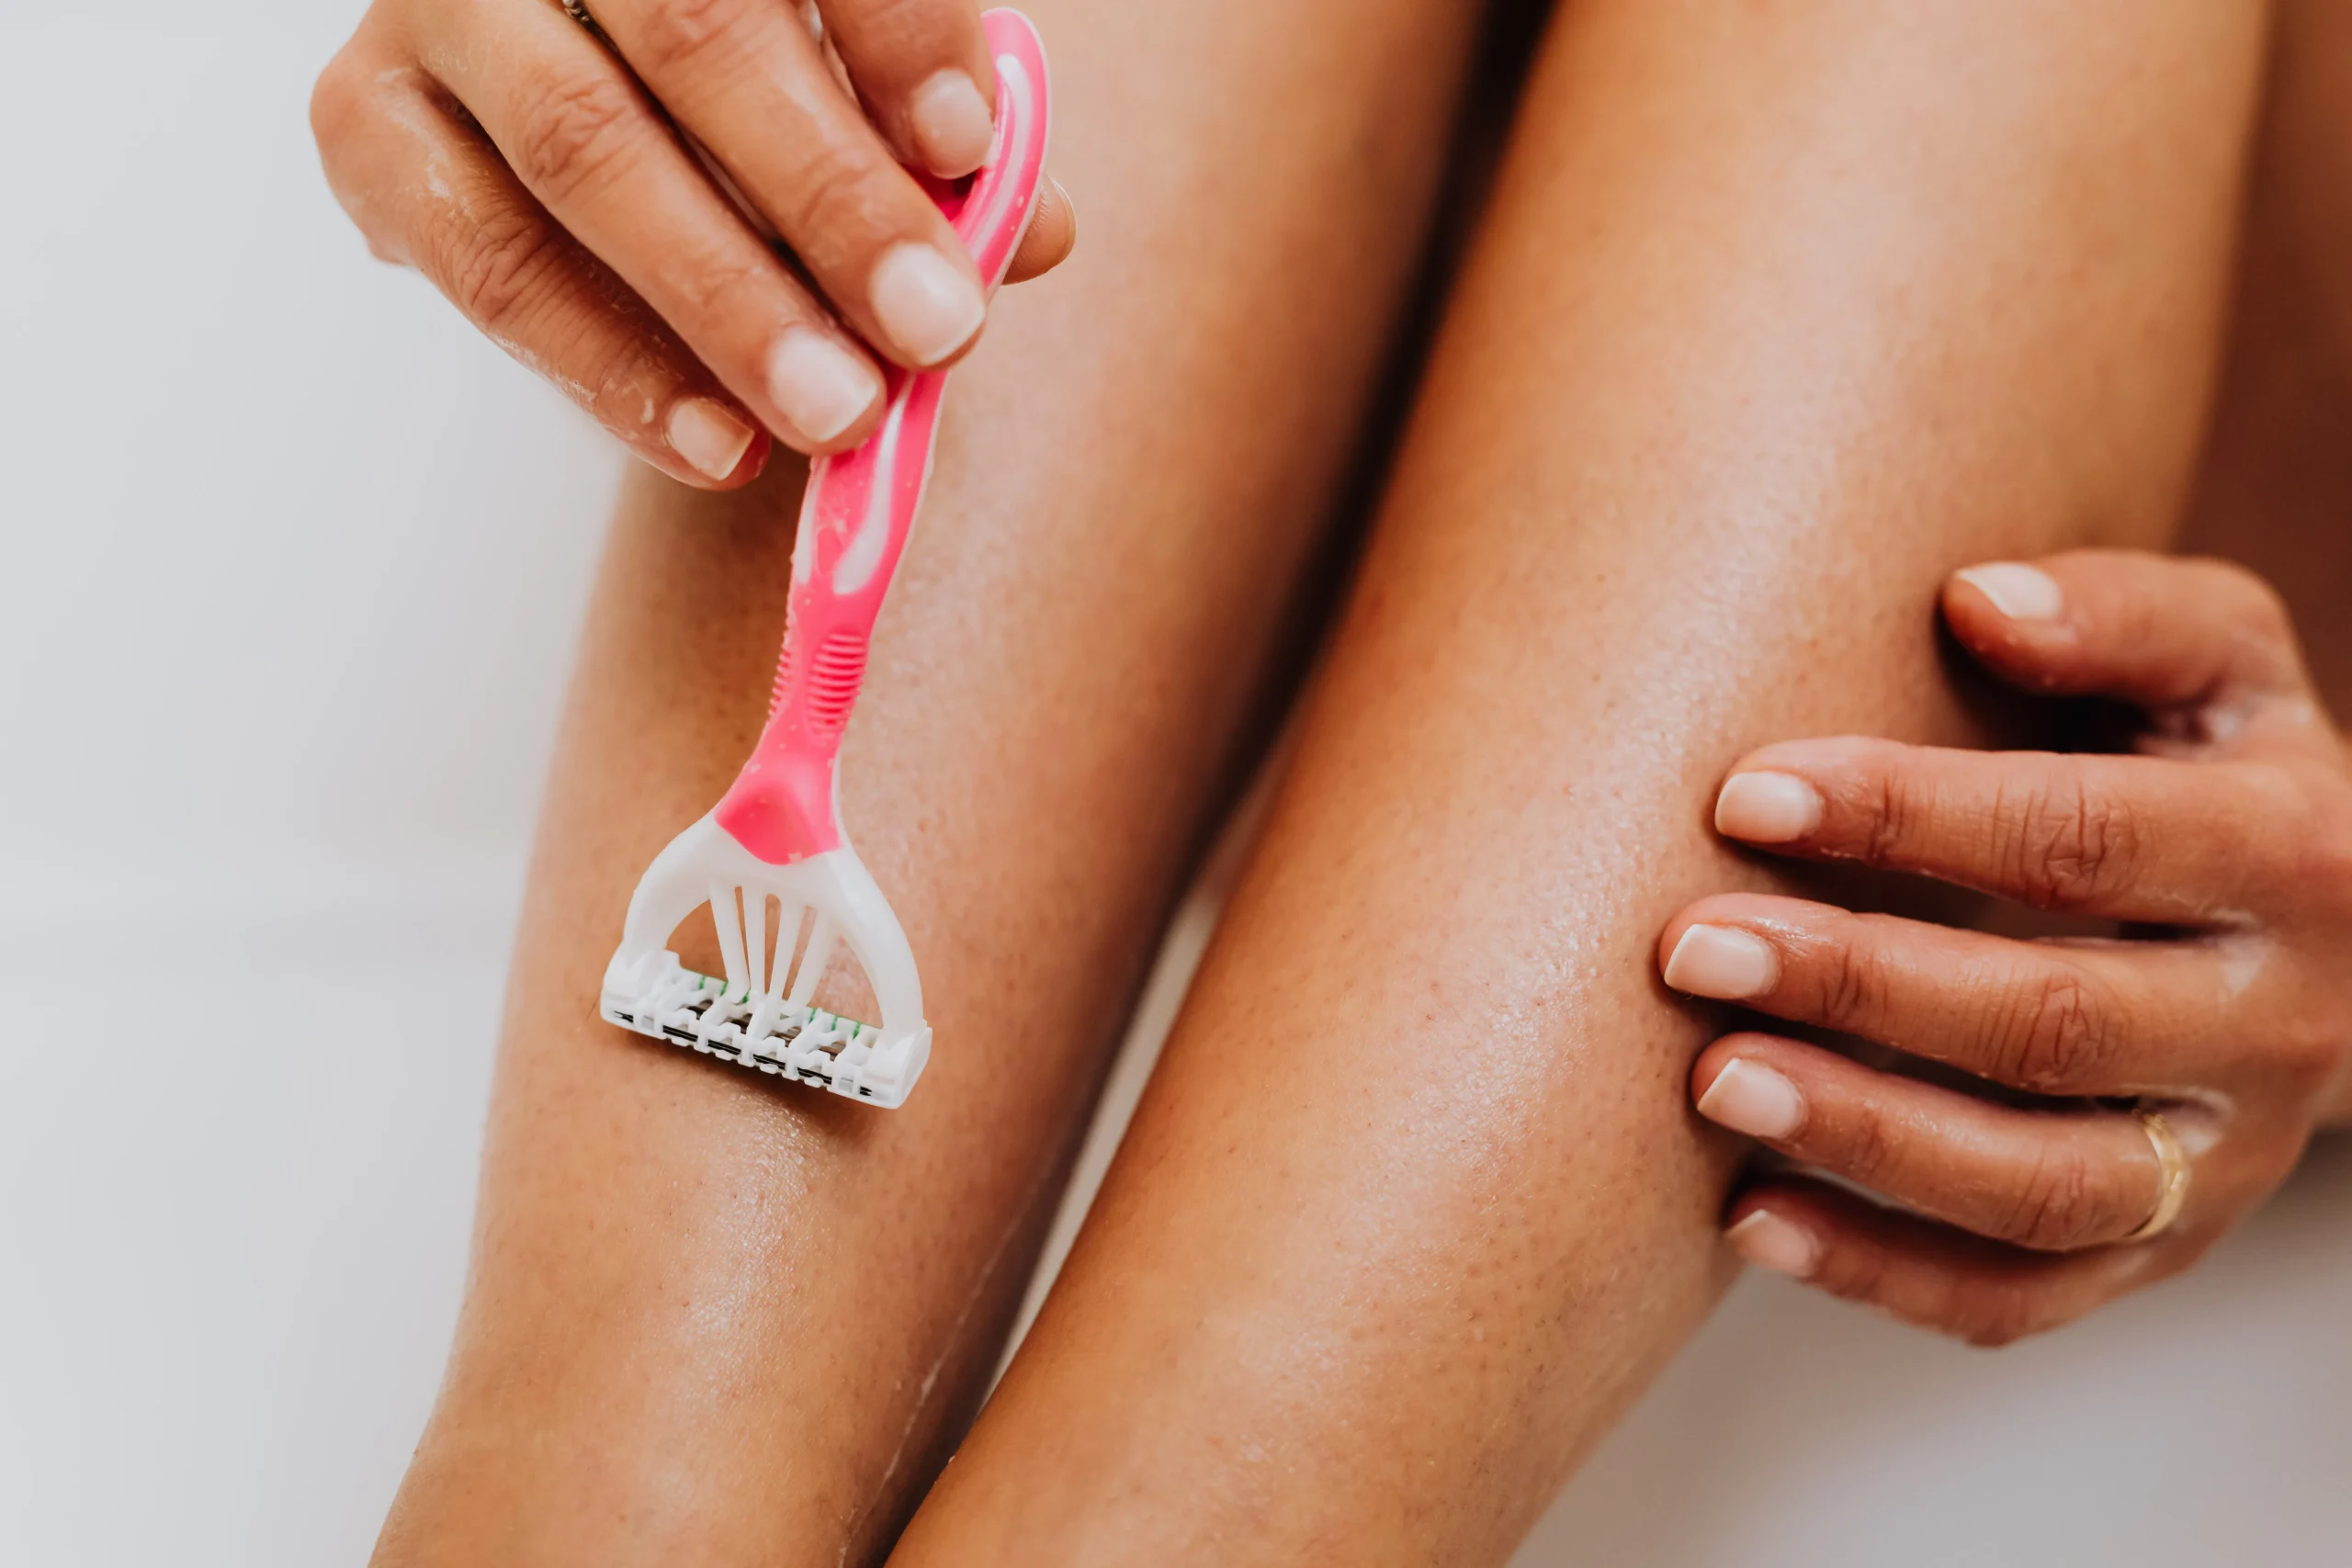
- Shave 24 hours before treatment: Do not wax or pluck. Lasers target the hair follicle, so hair must be present at the root but not above the skin’s surface. Shaving ensures the laser energy is delivered directly to the follicle, not absorbed by surface hair.
- Avoid sun exposure: For 2–4 weeks prior to your session, avoid direct sun exposure and discontinue all tanning products. Sunlight increases the risk of side effects such as hyperpigmentation or burns.
- Perform a patch test: Always conduct a patch test on a discreet area of your skin at least 48 hours before treating a larger area. This essential step allows you to check for any adverse reactions, ensuring your skin tolerates the device and energy level.
- Ensure clean, dry, makeup-free skin: Before each session, your skin must be completely free of lotions, deodorants, oils, and makeup. These products can interfere with the laser’s effectiveness and increase the risk of irritation.
- Select the right energy level: Begin with the lowest energy setting recommended by your device’s manual. Only increase the intensity if your skin tolerates it without excessive redness or discomfort beyond a few hours. Conservative energy progression is your best insurance against complications.
- Trim long hair (if advised): If your device manual advises against shaving too closely, trim any long hair in the treatment area to a suitable length.
- Prepare for post-treatment care: Have a cooling gel or soothing aloe product readily available to calm your skin immediately after the session.
Professional Guidance and Further Learning
While DIY laser waxing offers incredible convenience and results, professional guidance remains invaluable. If you’re uncertain whether at-home laser hair removal is the right choice for you, or if you’re exploring advanced treatment options, consulting experts is highly recommended. Amsterdam Beauty Clinic offers comprehensive laser hair removal services and expert home guidance. Explore their offerings for detailed information on how they can assist you in achieving lasting smooth skin: laser hair removal services.
How Do You Safely Perform DIY Laser Waxing for Effective Hair Reduction?
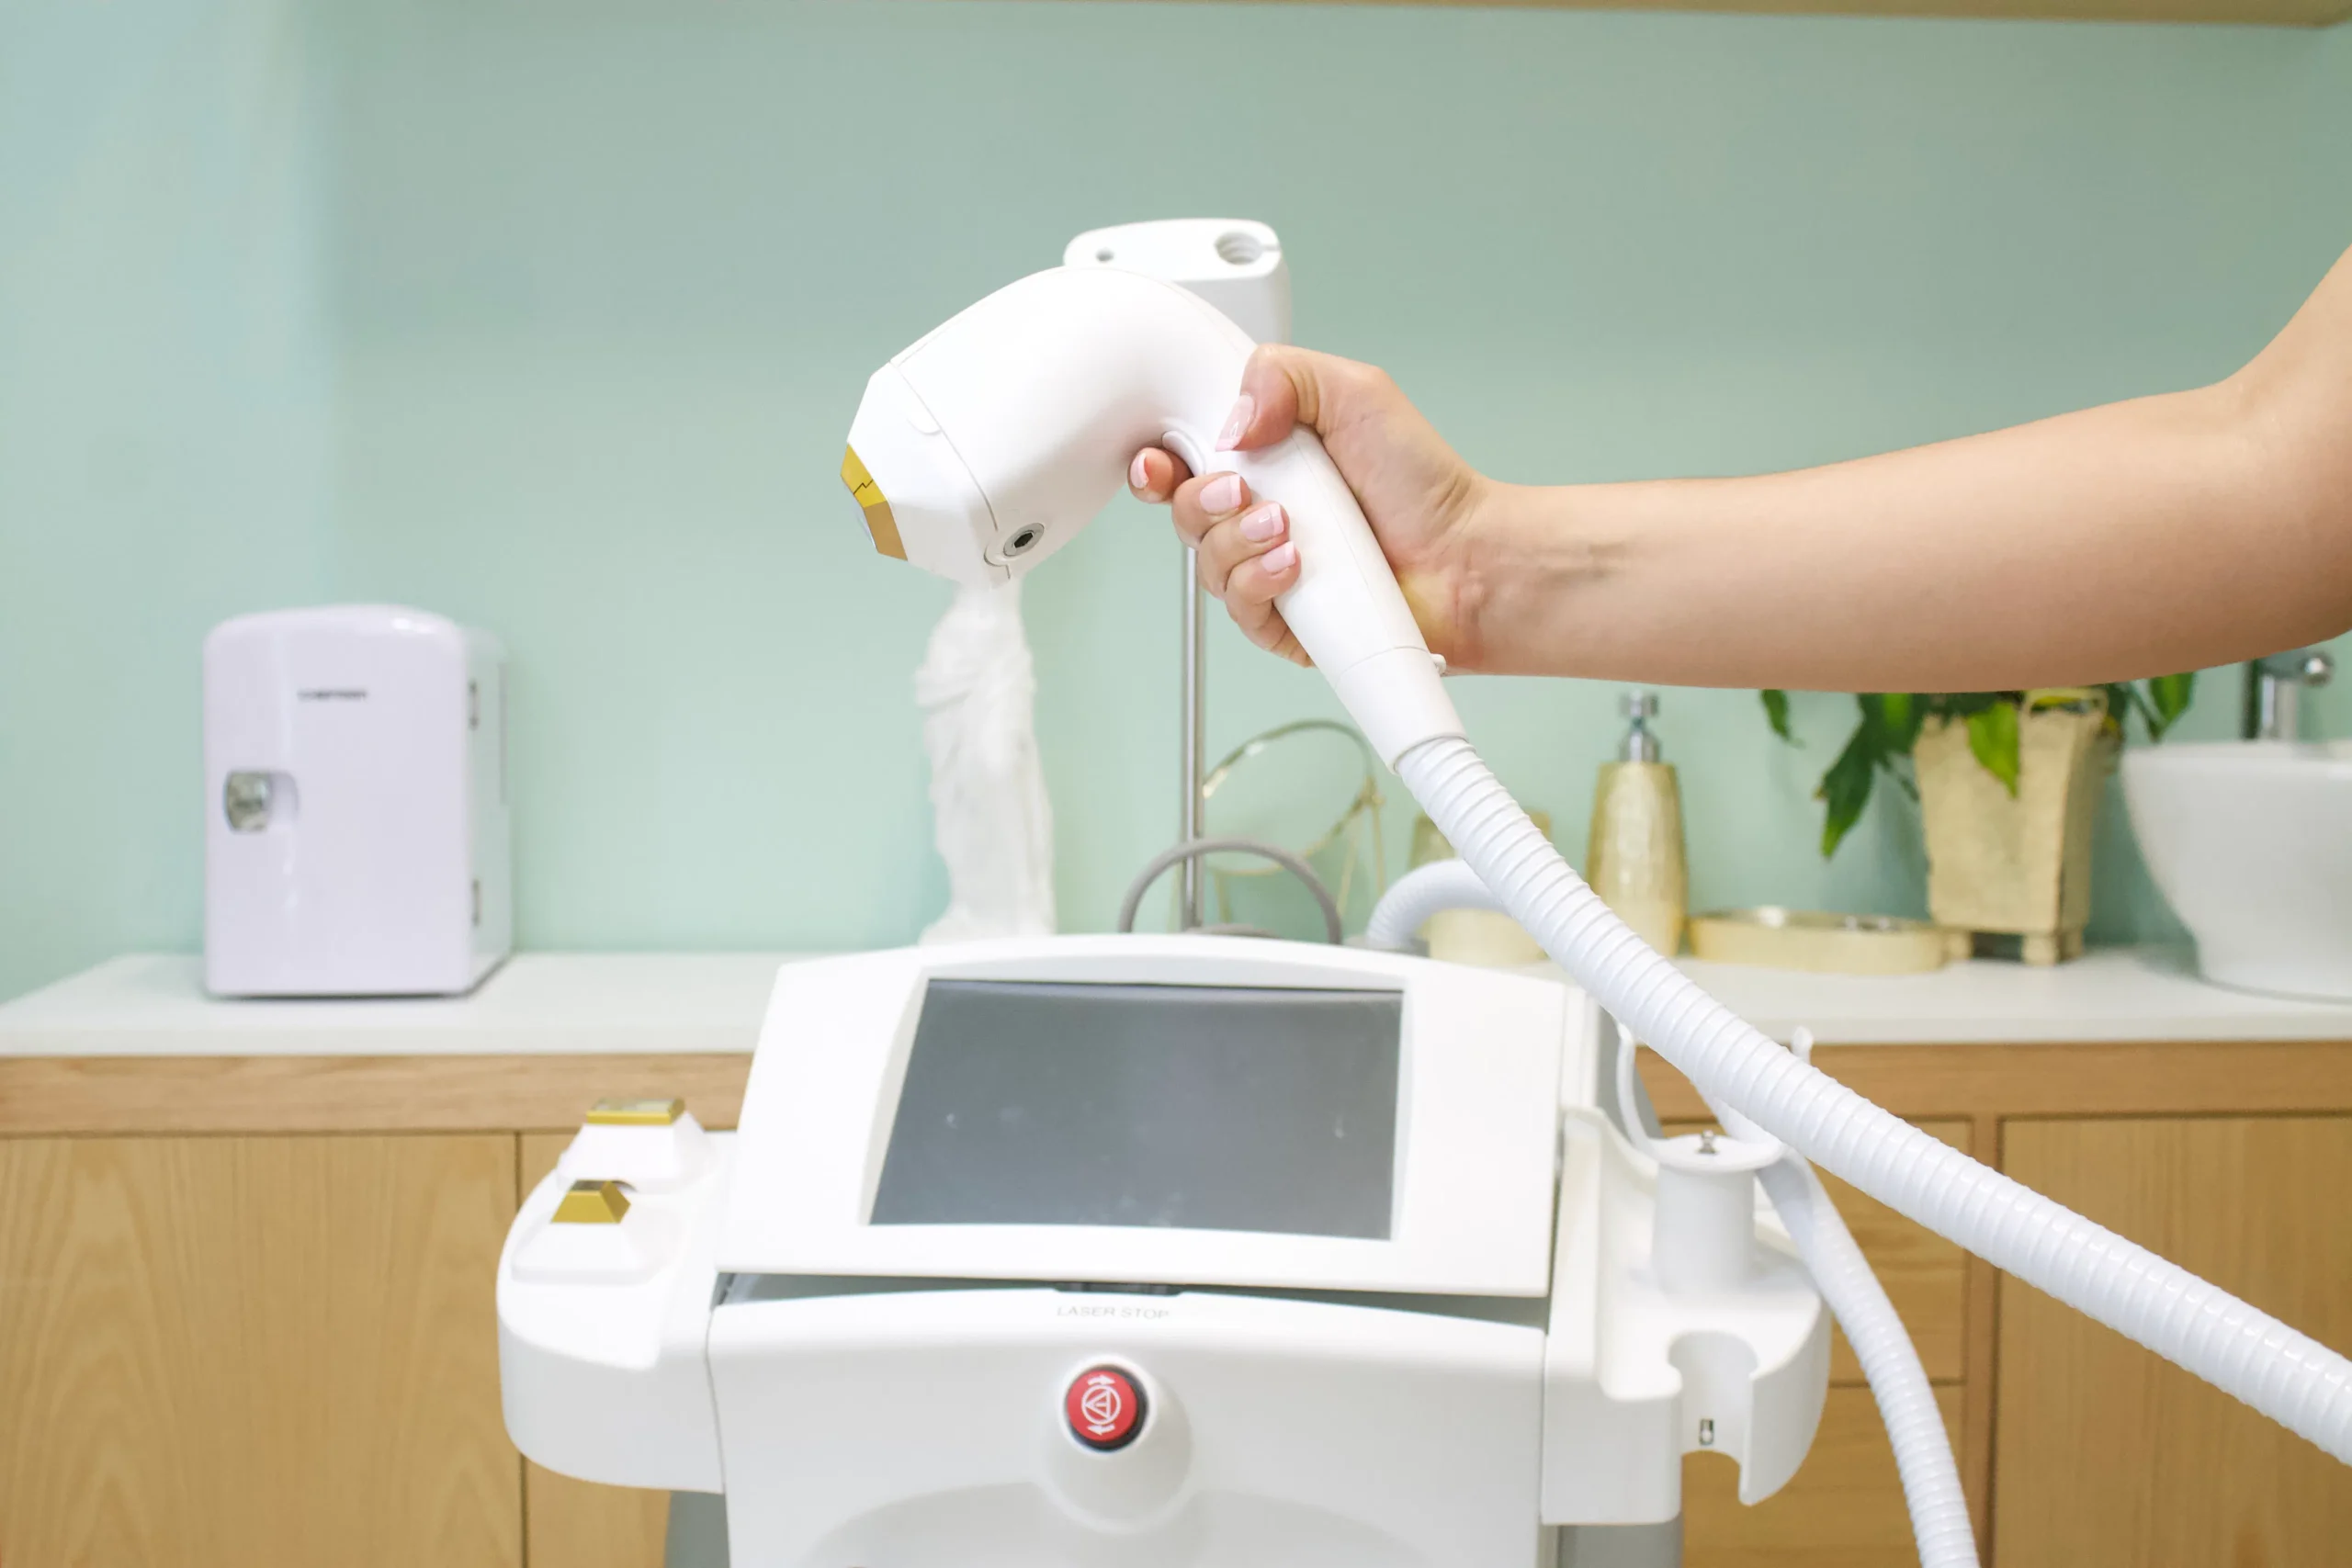
Photo by ANVA Marketing on Pexels
Start with a quick reality check: at-home laser devices can deliver lasting hair reduction, but technique and safety separate a good session from a skin emergency. I wrote this to give clear, clinic-caliber steps you can follow at home—especially for sensitive zones like the bikini line.
Pre-checks & device setup
Always use an FDA-cleared device and read the manual. Shave the treatment area 24 hours before—lasers target hair follicles, not surface hair. Clean, dry skin and a completed patch test (48 hours) are non-negotiable.
Wear protective eyewear if the device requires it; many at-home units have built-in sensors but don’t skip safety. Choose the lowest effective energy setting for your skin tone and hair color, then increase incrementally only if tolerated.
Micro-summary: Prepare deliberately—shave, patch-test, sensor-check—and start low.
The LASER workflow: a simple 6-step framework
- Locate and stretch: For the bikini line, gently stretch skin taut to create a flat target. Avoid mucous membranes and inner labia—treat the outer line only.
- Contact and align: Hold the applicator perpendicular with full contact. Most devices won’t fire unless positioned correctly.
- Pulse and move: Deliver one pulse per spot, then move the applicator ~50% overlap to avoid missed areas while preventing double-flashes.
- Glide rhythm: Keep a steady cadence; don’t rush. Small, methodical passes reduce heat build-up and improve coverage.
- Cool between passes: Use the device’s cooling function or a cool compress after every 3–4 passes on sensitive zones like the bikini line.
- Record and repeat: Note settings and skin reaction. Treat every 4–8 weeks depending on body area until you reach desired reduction.
Bold safety insight: If you see blistering, intense pain, or spreading redness, stop immediately and consult a dermatologist.
Micro-summary: Treat methodically—stretch, full contact, 50% overlap, cool often.
Post-treatment care
Apply a soothing gel (aloe vera), avoid sun exposure and hot baths for 48–72 hours, and skip exfoliation for a week. Expect temporary redness or swelling; most resolve in days. Multiple sessions (often 6–8) are needed for up to 90% reduction—consistent follow-up is key.
For professional-grade results or questions about suitability, consider consulting Amsterdam Beauty Clinic for expert advice on laser hair removal: laser hair removal.
Micro-summary: Soothe, protect from sun, and stay consistent for best laser hair reduction tips and results when learning how to laser wax at home, including bikini line laser wax care.
What Post-Treatment Care Ensures Optimal Results and Skin Health?
Redness, swelling, and temporary discoloration are common post-laser effects, typically subsiding within a few days. To manage these and protect your initial laser hair reduction results, immediate action is key:
- Begin cooling the treated area with a clean, cold compress for 10–15 minutes to reduce inflammation. Remember to avoid direct ice contact; always wrap it in a cloth.
- Follow up with a gentle, fragrance-free soothing gel, such as aloe vera, or a specialized post-laser balm. Embrace the principle that minimalism is the fastest route to recovery: fewer products, gentler ingredients are best.
For the first 24–48 hours, it’s crucial to:
- Avoid hot showers, saunas, strenuous exercise, and alcohol to prevent heat-driven irritation.
- Do not pick, scrub, or wax the treated area. Waxing removes follicles, directly undermining your laser treatment.
- Shaving, however, is permitted and even recommended between sessions.
Short micro-summary: To ensure optimal healing and protect your outcomes, immediately cool and soothe the skin while diligently avoiding heat and abrasive actions for the initial 48 hours. This sets the foundation for lasting smooth skin solutions.
As you move into days 3–14 post-treatment, focus on nurturing your skin for sustained smooth skin solutions.
- Maintain skin health by using a gentle, hydrating cleanser and a non-comedogenic moisturizer to aid barrier repair.
- Crucially, avoid strong active ingredients like retinoids, alpha hydroxy acids (AHAs), and benzoyl peroxide for at least one week, unless specifically advised by your clinician.
Sunscreen is non-negotiable. Apply broad-spectrum SPF 30+ daily and reapply diligently after swimming or sweating. Unprotected sun exposure significantly increases the risk of post-inflammatory pigmentation and can delay the healing process, compromising your laser hair reduction efforts.
While rare, if you observe prolonged blistering, intense pain, or spreading redness, contact a professional immediately. These symptoms, though uncommon, warrant prompt assessment to ensure your skin’s health.
Short micro-summary: Prioritize barrier function, steer clear of harsh actives, and commit to daily broad-spectrum sunscreen application to preserve your smooth skin solutions and enhance the efficacy of your at-home laser hair removal.
For truly lasting smooth skin solutions and to maximize the efficacy of your at home laser hair removal, long-term maintenance is crucial. Here are essential laser hair reduction tips:
- Maintain your session schedule: Typically 6–8 treatments spaced according to device guidance are required for optimal results.
- Shave between appointments: This ensures the laser targets hair follicles effectively without surface hair interference.
- Track your skin’s response: Adjust energy settings safely as needed, always following your device’s instructions.
Remember, consistency is the single biggest factor in achieving lasting results.
Should you have questions about device selection or require advanced aftercare protocols, consulting a reputable clinic is advisable. Seek out establishments that utilize modern equipment and prioritize gentle, vegan products. For instance, Amsterdam Beauty Clinic offers professional guidance across their services, including comprehensive laser hair removal and complementary skin treatments designed to support lasting smoothness. For local waxing options or salon-grade aftercare insights, explore resources on waxing in Amsterdam.
Short micro-summary: To convert short-term calm into long-term, smooth skin solutions, consistently follow your treatment plan, protect your skin daily, and don’t hesitate to seek expert clinic support for your laser hair reduction journey.
How Can You Achieve Permanent Hair Removal and Maintain Silky Smooth Skin?

Photo by olia danilevich on Pexels
If your goal is truly permanent hair removal—or at least clinically significant long-term reduction—you need a plan, not a one-off session. I’ve guided dozens of clients through at-home protocols that deliver durable results when paired with the right device and disciplined aftercare.
The 3‑Phase Framework: Prepare → Treat → Maintain
-
Prepare: schedule, skin prep, and device selection.
- Use an FDA-cleared device and complete a patch test. Shave (don’t wax or pluck) 24–48 hours before treatment. Avoid sun exposure for 2 weeks before and 2 weeks after.
- Track baseline photos and hair density so you can measure progress.
-
Treat: session cadence and technique.
- Hair grows in cycles—plan a series. Clinical data shows up to 90% hair reduction after 6–8 sessions; at-home results mirror this when consistent. Target intervals by area: face/bikini every 4 weeks, underarms 4–6 weeks, legs 6–8 weeks.
- Start at a conservative energy setting and increase as tolerated. Use overlapping passes per manufacturer guidance and apply cooling or aloe vera immediately after.
-
Maintain: consolidation and touch-ups.
- After the initial series, switch to maintenance: every 3–6 months in year one, then as-needed (commonly every 6–12 months).
- Keep a gentle daily skincare routine, SPF on treated areas, and avoid aggressive exfoliation for 48 hours post-session.
Small, consistent treatments beat sporadic intensity—that’s the difference between temporary trimming and a hair removal permanent solution.
Troubleshooting and realistic expectations
- Minor redness or swelling is normal and usually resolves in days. If you see blistering or persistent discoloration, pause treatments and consult a dermatologist.
- Device limitations: at-home systems work best on light-to-medium skin with darker hair. For mixed results, consider a clinic-grade top-up.
For professional-grade advice and complementary in-clinic options, I recommend reviewing Amsterdam Beauty Clinic’s approaches to safe at-home practices and clinic services; their guidance is useful for anyone using laser waxing at home.
Consistent scheduling, smart device use, and protective aftercare create the pathway from repeated hair reduction to lasting smoothness.
What Are the Most Common Hurdles in At-Home Laser Waxing and Their Solutions?
Starting a home laser routine can feel empowering — until a patch of red, a missed spot, or a smoky device leaves you second-guessing it. I’ve seen the same three problems repeat across clients and online forums; knowing their predictable fixes turns frustration into progress.
1) Immediate redness, swelling, or burning sensation
These are the most common reactions and usually signal normal post-treatment inflammation. The global data show redness and swelling often subside within days when managed correctly.
- Quick fixes: cool compresses (not ice directly), fragrance-free aloe vera gel, and a thin layer of a soothing emollient. Over-the-counter 1% hydrocortisone can help for 48–72 hours if irritation is moderate.
- Prevention: always perform a patch test and use the lowest effective energy level. A small test spot reduces big mistakes.
Skin summary: most irritation is temporary; soothe, monitor, and reduce energy on the next session.
2) Uneven hair reduction or missed follicles
Home devices work best with consistent technique and the right skin/hair pairing. Dark hair on lighter skin responds best.
- Troubleshooting: shave (don’t wax) before sessions, keep identical spacing and overlap passes slightly, and track session intervals (every 4–8 weeks depending on area).
- When to adjust: if whole zones lag after 3–4 sessions, increase energy one step or consult the device manual for recommended pulse settings.
Outcome summary: methodical, consistent sessions beat random attempts.
3) Device malfunction, poor contact, or sensor errors
Technical hiccups are common with frequent DIY use.
- Steps: clean the window, check battery/charger, ensure proper skin contact and remove lotions. If errors persist, contact manufacturer support or warranty service.
Technical summary: maintenance and proper contact are simple wins; persistent faults require expert support.
The 4-step Fix Framework: Assess → Adjust → Soothe → Escalate
If symptoms continue (blistering, intense pain, spreading discoloration, signs of infection) seek professional help. For expert guidance or in-clinic alternatives, consider Amsterdam Beauty Clinic — their advanced, minimally discomforting laser services and natural aftercare products can bridge the gap between DIY and professional results. If you prefer a salon approach, explore options for professional waxing for areas needing specialist attention.
Practical takeaway: combine laser hair reduction tips with disciplined technique and a low-threshold plan to escalate — and you’ll reduce surprises while improving long-term results with at home laser hair removal and DIY laser waxing routines.
Is At-Home Laser Waxing the Right Path to Your Permanent Smooth Skin Goal?
Photo by Harry Tucker on Pexels
Indeed, for many individuals, at-home laser waxing presents a highly effective and long-term pathway toward achieving permanent hair reduction, becoming a valuable component in their pursuit of smooth, hair-free skin. Success hinges on a trifecta of factors: consistent application, judicious device selection, and cultivating realistic expectations.
This efficacy is rooted in established science: clinical data consistently demonstrate that laser methods can achieve up to a 90% reduction in hair growth following a series of sessions. Crucially, numerous FDA-cleared at-home devices now harness this precise targeting principle, bringing professional-grade technology directly into your personal space. While the power output of at-home units may not always equal that of clinical machines, their distinct advantages lie in significant cost savings—a one-time device purchase versus recurring clinic sessions that can range from $200 to $400 each—and unparalleled convenience, particularly when adhering diligently to the recommended treatment schedule.
If you want lasting results, treat it like a program, not a single treatment.
The Suitability Checklist: A Practical Framework for At-Home Laser Success
- Skin & Hair Match: Optimal outcomes are typically observed on individuals with light-to-medium skin tones and darker hair, as the laser targets the melanin pigment within the hair follicle.
- Device Selection: Prioritize an FDA-cleared product equipped with integrated skin-tone sensors and adjustable energy levels to ensure both safety and efficacy tailored to your specific needs.
- Meticulous Preparation & Safety: Always shave the treatment area, perform a crucial patch-test, rigorously avoid sun exposure before and after sessions, and meticulously adhere to all manufacturer guidance.
- Unwavering Consistency: Plan for a course of 6–12 sessions, precisely spaced according to your device’s instructions. It is vital to anticipate and commit to ongoing maintenance treatments following the initial regimen.
- Proactive Risk Awareness: While temporary redness or mild swelling are common and typically subside quickly, it is prudent to consult a dermatologist immediately should you experience concerns about persistent pigmentation changes or potential scarring.
In essence, by diligently addressing these critical prerequisites, at-home laser waxing emerges as a demonstrably cost-effective and highly viable pathway to achieving substantial, lasting hair reduction.
When to Choose Professional Help
However, certain scenarios unequivocally call for professional intervention. Individuals with darker skin tones, very light (or white/grey) hair lacking sufficient melanin, those experiencing hormonal hair growth, or anyone with a history of adverse skin reactions to light-based treatments will find a clinical approach superior. Professional settings offer access to higher-power devices, sophisticated customized settings, and invaluable medical oversight, ensuring both safety and optimal results. For a comprehensive, clinic-grade consultation and exploration of advanced options, including combined treatment modalities, we recommend contacting Amsterdam Beauty Clinic for their expert laser hair removal services.
Ultimately, the journey to lasting smooth skin through at-home laser waxing demands commitment to the routine, unwavering respect for all safety protocols, and an understanding that results are cumulative, building progressively over time. Begin prudently with a patch test, maintain rigorous consistency, and you will undoubtedly discover at-home laser waxing to be a practical, highly effective, and empowering solution for achieving enduringly smooth skin.
Ready for permanently smooth skin? Explore professional treatments and expert advice at Amsterdam Beauty Clinic to complement your at-home journey.
Frequently Asked Questions about At-Home Laser Waxing
What is the difference between laser waxing and traditional waxing?
Traditional waxing removes hair from the root by applying wax and pulling it off, providing temporary results. Laser waxing, or more accurately laser hair removal, uses concentrated light to target hair follicles, damaging them to significantly reduce or permanently halt hair growth over time.
How many sessions of at-home laser hair removal are typically needed for permanent results?
Achieving permanent hair reduction usually requires multiple sessions, often 6-8, spaced a few weeks apart. Consistency is key, as hair grows in different cycles. Maintenance sessions may be needed to address any regrowth.
Is at-home laser hair removal safe for all skin types and hair colors?
At-home laser devices are most effective on lighter skin tones with darker hair, as the laser targets pigment. While newer devices have improved safety features for various skin tones, individuals with very dark skin or very light hair (blonde, gray, red) may not see significant results or could be at higher risk for side effects.
What should I do if I experience skin irritation after at-home laser waxing?
Mild redness or irritation is common. Apply a soothing, fragrance-free moisturizer like aloe vera gel. Avoid sun exposure and hot showers for 24-48 hours. If irritation is severe or persistent, discontinue use and consult a healthcare professional.
Can I use at-home laser hair removal on my bikini line?
Yes, many at-home laser devices can be used on the bikini line. It’s crucial to follow the device’s instructions carefully, perform a patch test, and use the appropriate setting for this sensitive area to ensure safety and effectiveness.
How does at-home laser waxing compare in cost to professional treatments?
The initial investment for an at-home laser device can range from $200 to $600, which may seem high. However, over time, it can be more cost-effective than multiple professional laser hair removal sessions, which can cost $200-$400 per session depending on the area.