Why Consider At-Home Leg Waxing for Silky Smooth Results?
If you want salon-smooth legs without the recurring cost or scheduling friction, leg waxing at home is worth a close look. It bridges the gap between quick fixes like shaving and longer-term options like laser hair reduction — giving you reliably smooth skin for weeks, not days.
At-home waxing wins on three clear benefits: cost-effectiveness, convenience, and longer-lasting results. A single successful DIY session removes hair from the root, which delays regrowth for 3–6 weeks and yields a noticeably smoother surface compared with shaving. Over time, regular waxing can make hair finer and sparser.
Soft wax with strips is usually the best choice for legs — it covers large areas efficiently and is forgiving for beginners.
Practical expectations: hair should be about 1/4 to 1/2 inch for effective removal (trim to ~3/4 inch if too long). Exfoliate 1–2 days before waxing to remove dead skin and improve grip, but avoid exfoliating immediately before the session. Apply wax in the direction of hair growth and remove quickly against it while holding the skin taut.
Quick checklist for successful DIY leg waxing:
- Prep: clean, dry skin; correct hair length; light exfoliation 48 hours earlier.
- Technique: soft wax for legs; short, confident pulls; hold skin taut.
- Aftercare: avoid sun, hot baths, strenuous exercise for 24–48 hours; moisturize daily and begin gentle exfoliation 2–3 days later to prevent ingrowns.
This is a practical smooth legs guide: with the right prep and a quality kit, DIY leg waxing delivers salon-worthy results at a fraction of the price and on your schedule.
If you prefer professional support or want to explore combined options, Amsterdam Beauty Clinic offers expert waxing and related services that pair advanced techniques with natural, vegan products—see their full range of waxing services.
Small habit changes (prep + aftercare) produce the biggest payoff: longer-lasting smoothness and fewer complications.
What Preparations Are Essential for a Successful At-Home Wax?
Quick hook: small prep, big payoff
A flawless at-home wax starts long before the strip or pot touches your skin. Nail these preparation steps and you’ll reduce discomfort, prevent ingrown hairs, and get salon-quality smoothness from the comfort of home.
Hair length: the non-negotiable first step
For effective waxing, hair should be approximately 1/4 to 1/2 inch long — about the length of a grain of rice. If hair is significantly longer, trim it down (guidance: you can reduce to roughly three-quarters of an inch if necessary) so the wax grips evenly without bunching.
- Too short = wax won’t catch the follicle.
- Too long = more tugging and uneven removal.
Getting length right cuts pain and improves results.
Short recap: aim for 1/4–1/2″ hair; trim if needed.
Exfoliation, cleansing and drying: timing matters
Exfoliate 1–2 days before waxing to remove dead skin that blocks wax grip and causes ingrowns. Don’t scrub right before your session — fresh micro-abrasions increase sensitivity.
On wax day, cleanse with a gentle, oil-free cleanser to remove lotions, sweat, and residue. Pat skin completely dry; any moisture or oil ruins adhesion and encourages slippage.
- Avoid heavy creams or oils immediately before waxing.
- If you’re prone to oils, use a light talc-free powder to ensure dryness.
Micro-summary: exfoliate 48–24 hours prior; cleanse and fully dry the skin on the day.
Choosing a kit: soft wax vs hard wax for legs
For at-home hair removal on legs, soft wax with strips is generally the best choice — it covers larger surface areas quickly and is widely available in quality kits. Hard wax works great for small, sensitive zones but is slower across calves and thighs.
Look for a best leg wax kit that includes:
- a reliable wax heater or pre-warmed bead formula,
- high-quality strips or wooden spatulas,
- clear temperature guidelines and skin-safe ingredients (vegan/natural if you prefer).
At Amsterdam Beauty Clinic we favour gentle, effective formulations that minimise discomfort while delivering smooth results — for clinic services and for clients learning at-home techniques. Learn more about professional waxing.
Final micro-summary: prep hair and skin deliberately, choose soft wax for legs, and use a kit with clear instructions for safer, smoother at-home waxing.
Keywords: prep for leg waxing, best leg wax kit, at-home hair removal, leg waxing tips 2026.
How Do You Master the Step-by-Step At-Home Leg Waxing Process?
Quick reality check before you begin
If you want salon-smooth legs without the salon bill, technique matters more than brute force. Mastering leg wax at home means preparation, temperature control, and a confident, fast removal motion — not tugging or second-guessing.
Do this before you wax: hair at 1/4–1/2 inch, exfoliate 1–2 days earlier, skin clean and dry.
Supplies and setup (keep it simple)
- Choose a soft wax with strips for larger areas — it grips effectively for leg waxing. Hard wax is best reserved for small, sensitive spots.
- Have strips, a wooden spatula, baby powder or pre-wax oil (light), antiseptic wipes, and a cold compress ready.
- Heat wax to a warm, spreadable consistency — warm enough to flow smoothly, but not so hot it burns. Test on the inside wrist.
Skin prep and timing matter: exfoliate 1–2 days before, avoid heavy lotions the day of, and ensure hair length is 1/4–1/2 inch (trim to ~3/4 inch only if hair is too long).
This short prep prevents breakage and delivers cleaner pulls.
Step-by-step: mastering DIY leg waxing
- Work on one small section at a time (about 3–4 inches wide). Working in sections keeps wax temperature even and reduces pain.
- Lightly dust skin with baby powder — this removes excess oil and helps wax adhere to hair, not skin.
- Apply wax in the exact direction of hair growth using firm, even pressure. Smooth a thin, uniform layer and press a strip down firmly if using strip wax.
- Hold the skin taut with your free hand, close to the strip, to reduce movement and pain.
- Remove the strip quickly and parallel to the skin, pulling against hair growth. Do not pull up; keep the strip low and fast.
- Immediately press your palm over the area to soothe the sting and stop bleeding if tiny capillaries open.
- Continue section by section; avoid waxing the same spot multiple times in one session.
- For ankles and behind the knees use smaller strips and gentler pressure — hair there is finer and the skin thinner.
- After finishing, wipe the skin with a post-wax wipe or antiseptic, apply a calming gel, and avoid sun, hot showers, swimming, and tight clothes for 24–48 hours.
- Moisturize daily and begin gentle exfoliation 2–3 days later to prevent ingrown hairs.
Master the rhythm: apply with the grain, remove against it, hold skin taut, and work in measured sections.
If you want professional alternatives or a refresher on advanced techniques, Amsterdam Beauty Clinic offers expert waxing and related services to help you choose between at-home and in-clinic options — explore their waxing (https://amsterdambeautyclinic.nl/all-services/).
Short recap: Proper prep + correct wax temperature + confident, fast removal = successful DIY leg waxing.
What Are the Golden Rules for Post-Waxing Care to Maintain Smoothness?
Immediate care: the first 24 hours
Right after waxing your legs the skin is open, warm, and more reactive than usual — treat it like a fresh micro-injury, not a beauty emergency. Cool compresses, fragrance-free calming gels (aloe vera or panthenol), and post-depilatory products help calm inflammation and reduce redness.
- Clean gently with lukewarm water and a mild, soap-free cleanser.
- Apply a cool compress for 5–10 minutes if you feel burning or heat.
- Use a light, alcohol-free soothing gel; avoid perfumed lotions and oil-based creams for the first day.
- Wear loose clothing made of natural fabrics to avoid friction.
Soothe first, treat later — immediate calming prevents most common complications.
In short: hydrate, cool, and keep friction low for 24–48 hours.
Days 2–7: moisturize, protect, and prepare the skin
After the initial calm, shift to daily moisture and protection. A light, non-comedogenic moisturizer applied once or twice daily keeps the skin supple and supports hair-free longevity. Avoid hot showers, saunas, swimming pools, and heavy exercise for at least 24–48 hours to prevent irritation and infection.
Begin gentle exfoliation 2–3 days after waxing to prevent ingrown hairs. Use either a soft physical tool (exfoliating mitt or soft brush) once or twice a week or a mild chemical exfoliant with low-concentration salicylic acid. Be conservative — over-exfoliating restarts inflammation.
Micro-summary: daily moisture + delayed, gentle exfoliation = fewer ingrown hairs and longer-lasting silky smooth legs.
Troubleshooting & when to see a pro
Small bumps and redness that clear within a few days are normal. If you notice persistent swelling, spreading redness, pus, or painful nodules, stop home therapies and consult a professional. At Amsterdam Beauty Clinic we combine expert waxing, calming aftercare, and alternatives like laser hair reduction for clients who want longer-term solutions — learn more about our post-waxing support on our services page: post-waxing care legs.
For tips on improving your routine and mastering at-home technique, see our guide to expert waxing and safe at-home hair removal.
Checklist: cool compress, alcohol-free soothing gel, loose clothes, avoid heat/water/exercise 24–48 hrs, moisturize daily, start gentle exfoliation at day 2–3, seek professional care for infection or persistent irritation.
Keep these golden rules consistent and you’ll maintain truly silky smooth legs between appointments.
Can You Avoid Common Mistakes and Enhance Your At-Home Waxing Experience?
Photo by Pavel Danilyuk on Pexels
Small habits make the difference between a painful, patchy result and salon-worthy smoothness. I’ve taught countless clients how to iterate their technique; the same principles apply at home.
Always start with a patch test and consistency—both protect your skin and refine results.
Common mistakes and quick fixes
- Skipping a patch test. Test a tiny area 24–48 hours before a full session to check sensitivity or allergic reactions.
- Waxing hair that’s too short or too long. Aim for 1/4–1/2 inch; if hair is too long, trim to about 3/4 inch before waxing.
- Exfoliating at the wrong time. Exfoliate 1–2 days before waxing, not immediately before—freshly exfoliated skin is more reactive.
- Using the wrong wax. For legs, soft wax with strips delivers the cleanest pull; reserve hard wax for smaller, sensitive zones.
- Pulling skin incorrectly. Apply with hair growth, remove opposite it quickly while holding skin taut to minimize pain and breakage.
A practical checklist reduces errors and speeds up skill-building.
Pro tips to upgrade your DIY leg waxing
- Create a consistent routine: waxing every 4–6 weeks trains hair to regrow finer and slower.
- Use cooling compresses and a calming post-wax gel immediately after to reduce inflammation.
- Avoid sun, hot showers, swimming, tight clothes, and strenuous activity for 24–48 hours post-wax.
- Moisturize daily and begin gentle exfoliation 2–3 days later to prevent ingrown hairs.
Pro tip: treat at-home waxing like a repeated skill—log what works, from wax brand to temperature and skin prep.
If you want professional-grade advice or alternatives like laser hair reduction, Amsterdam Beauty Clinic offers expert treatments and guidance; consider their services when DIY isn’t enough for the results you want (their site lists comprehensive waxing and hair removal options).
These small course-corrections—patch testing, correct hair length, timing exfoliation, right wax choice, and consistent aftercare—are the fastest path from trial-and-error to reliably smooth legs.
Micro-summary: Patch test, prep to the right hair length, choose soft wax for legs, follow post-wax rules, and repeat consistently for the best DIY leg waxing results.
What Should You Do If You Encounter At-Home Waxing Challenges?
Quick Triage: Immediate Steps When Waxing Goes Wrong
Even with careful preparation, minor issues can sometimes arise during at-home waxing—a stubborn patch of hair, unexpected residue, or sensitive skin reacting with redness. When this happens, it’s crucial to stop waxing that specific area immediately and implement a calm, consistent troubleshooting routine. By applying a cool compress, carefully removing any residue, and reassessing your technique, you can prevent minor irritation from escalating into a more significant problem. A calm, step-by-step response is key to safeguarding your skin’s health and comfort.
- For sticky residue: Gently remove it with an oil-based product, such as coconut oil or light baby oil. Apply the oil in the direction of hair growth, allowing it to dissolve the wax, then wipe it away with a soft cloth. Afterward, cleanse the area with a mild, fragrance-free wash. Avoid harsh scrubbing, which can further irritate the skin.
- For incomplete hair removal: First, check the hair length. For optimal results, hair should be approximately 1/4 to 1/2 inch long. If the hair is too short, wait until it reaches this ideal length for effective gripping. If it’s too long, trim it to about three-quarters of an inch before attempting to wax again. This ensures the wax can properly adhere to and remove the hair from the follicle.
- For immediate irritation or redness: Apply a cool compress to the affected area to reduce inflammation. Follow this with a soothing gel like aloe vera or a specialized post-depilatory product. For the next 24–48 hours, avoid hot showers, direct sun exposure, and tight clothing, as these can exacerbate skin sensitivity.
Micro-summary: Use oil to gently lift residue, adhere to the 1/4–1/2 inch rule for effective hair removal, and promptly soothe skin to minimize inflammation.
Fixes and Enhanced Techniques for Next Time
To prevent future waxing mishaps and achieve consistently smoother results, it’s essential to address the root cause by fine-tuning your at-home waxing techniques. For effective leg waxing at home, we recommend using soft wax with strips across larger areas. Always apply the wax precisely with the direction of hair growth and remove it quickly against the growth, ensuring you hold the skin taut to minimize discomfort and improve hair removal efficiency. Incorporate exfoliation into your routine 1–2 days before waxing to remove dead skin cells, and begin gentle exfoliation 2–3 days after to prevent ingrown hairs. This proactive approach significantly enhances your waxing outcome.
Small technique tweaks yield dramatically smoother, more comfortable results and reduce common issues.
Practical checklist for optimal waxing:
- Confirm hair length is appropriate and ensure skin is thoroughly clean and dry.
- Always patch-test new products on a small area of skin to check for adverse reactions.
- Apply wax with consistent, even pressure, creating a uniform layer.
- Hold the skin taut with one hand and remove the wax strip swiftly in the opposite direction of hair growth.
Micro-summary: Thorough preparation and correct application are paramount to resolving most common at-home hair removal challenges.
When to Seek Professional Expertise
While at-home waxing can be effective, there are instances when professional intervention is advisable. If irritation persists, you experience widespread blistering, or if ingrown hairs become infected, consulting a professional is crucial for proper treatment and guidance. Amsterdam Beauty Clinic offers advanced, minimally discomforting waxing and hair removal services, delivered by experienced specialists. We can expertly advise whether advanced in-clinic waxing or a longer-term solution like laser hair reduction is the optimal choice for your skin and hair type. For comprehensive guidance on local options and what to expect from professional services, explore our detailed guide to waxing in Amsterdam.
If you’d like, we can walk you through a tailored troubleshooting checklist specifically designed for your at-home kit and unique skin type, ensuring you achieve the best possible results.
Are You Ready to Embrace Your Flawlessly Smooth Legs?
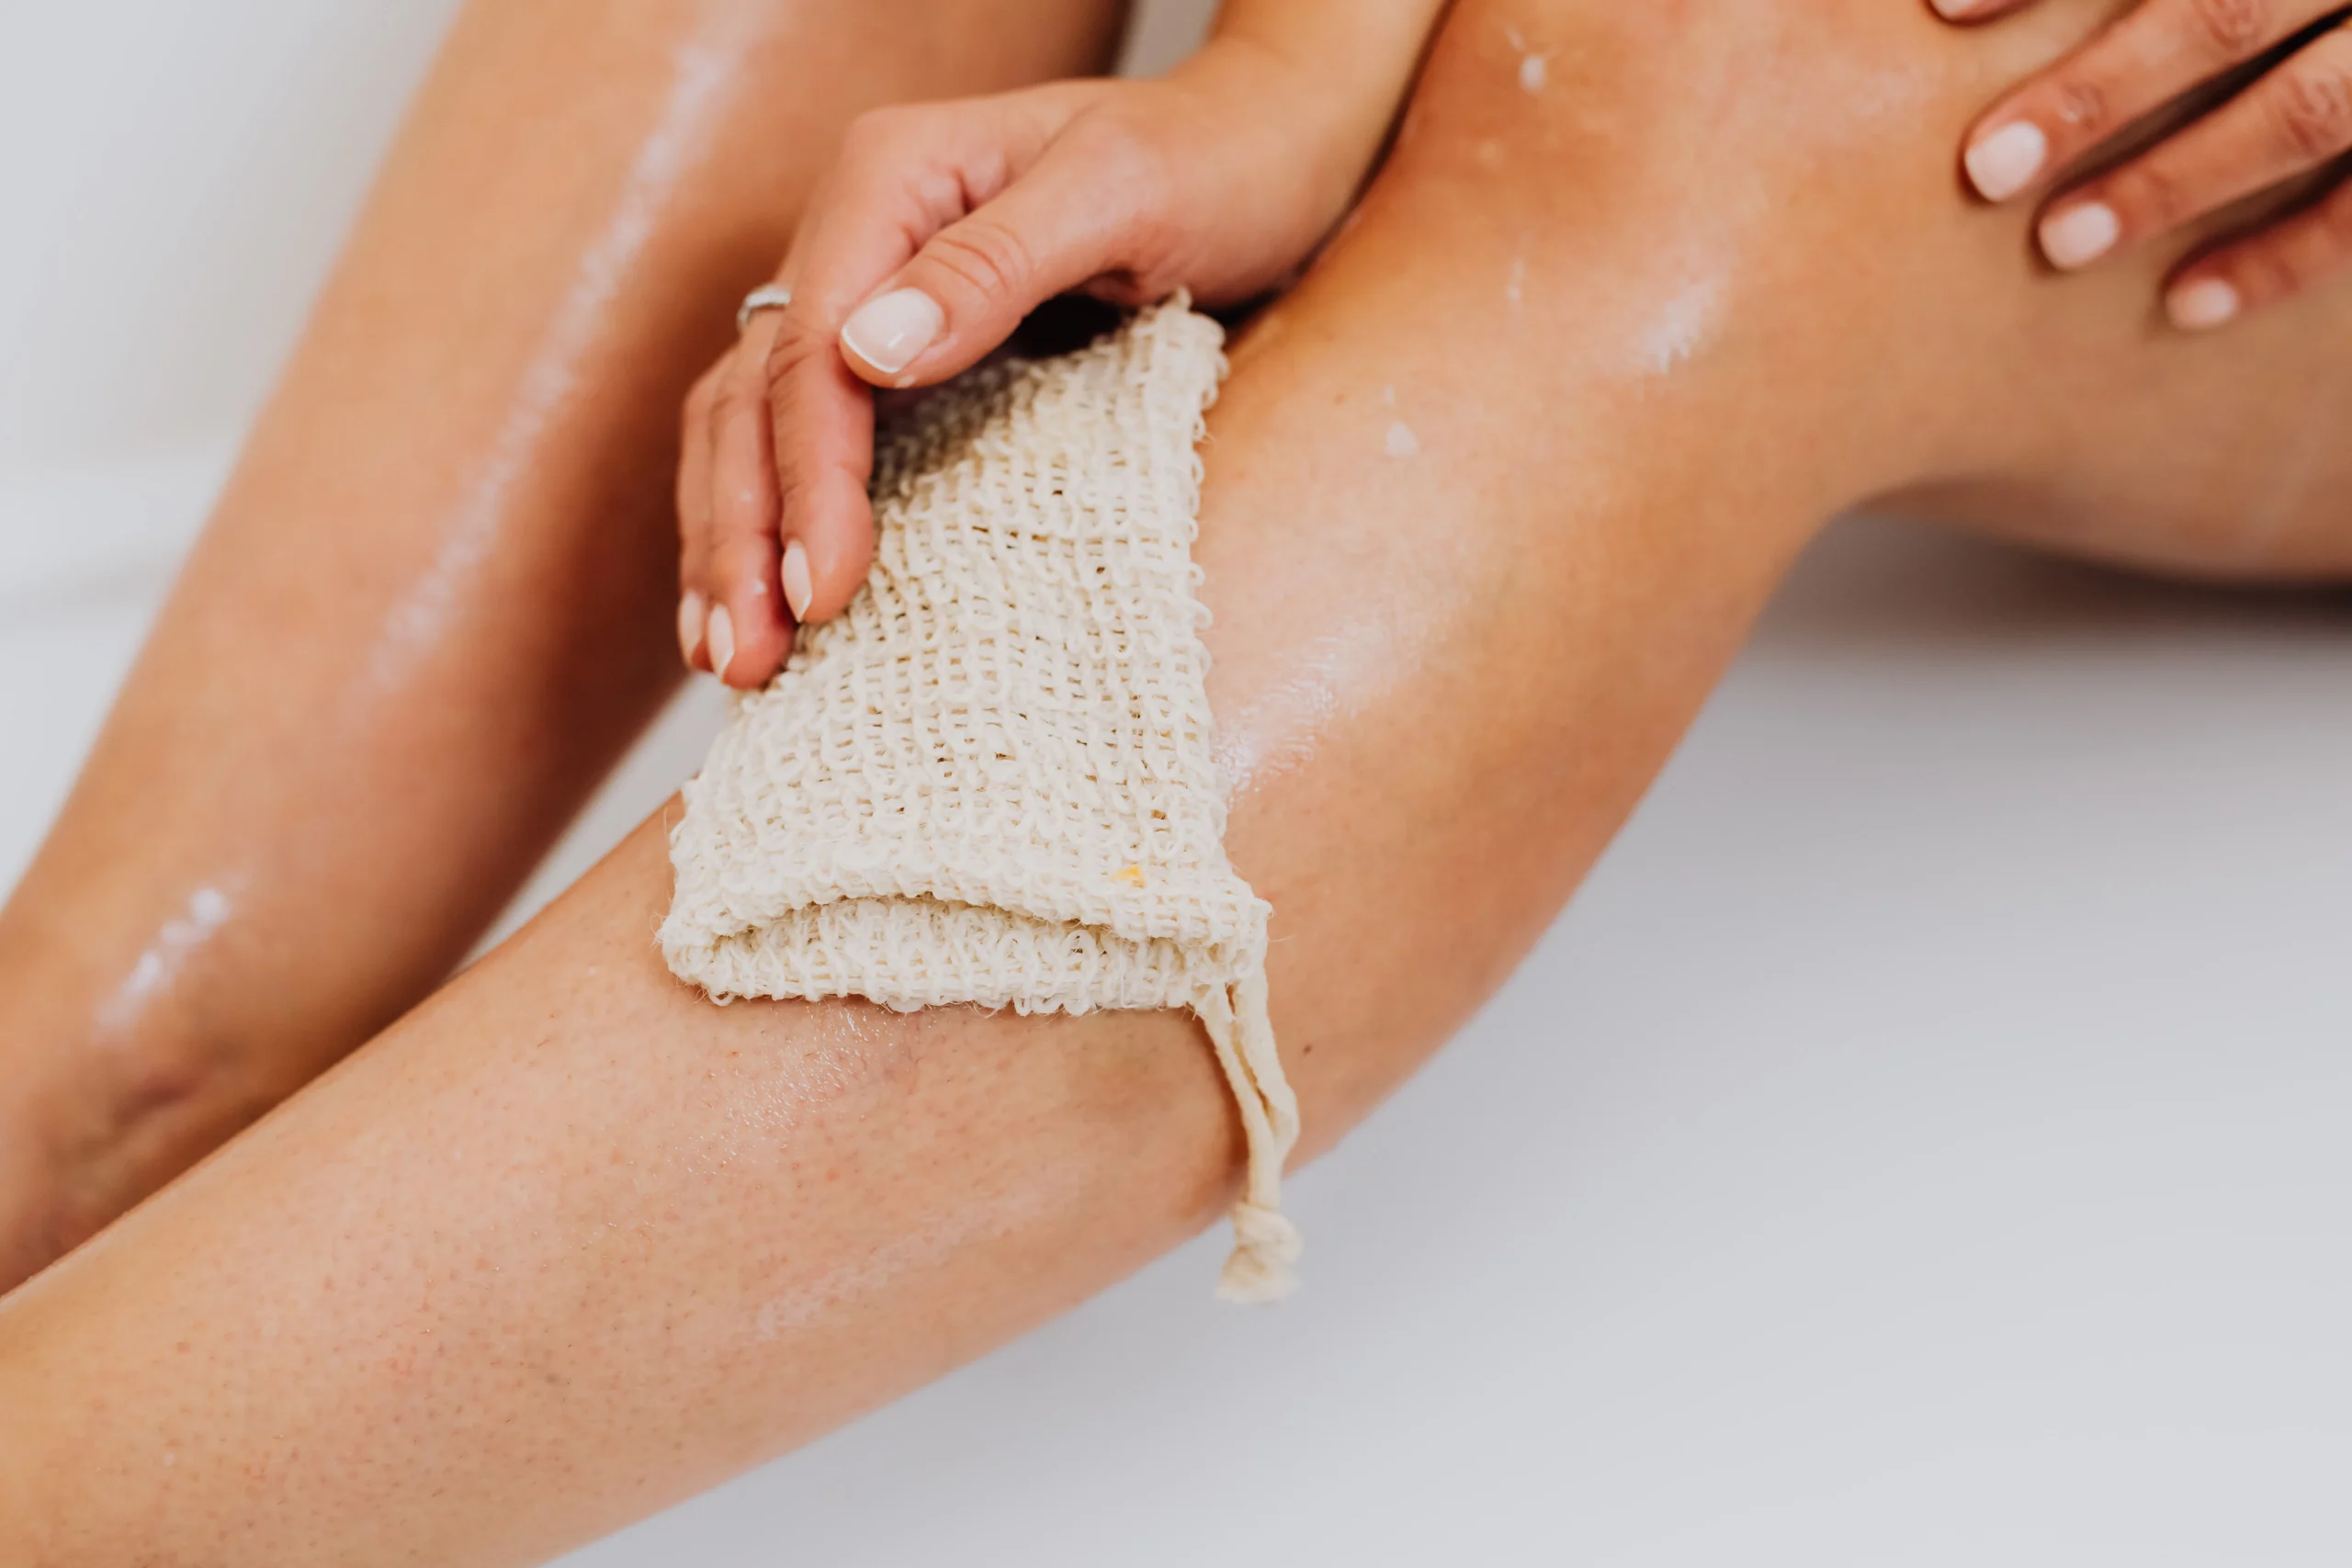
Photo by Karolina Grabowska www.kaboompics.com on Pexels
You’ve read the steps, learned the prep, and practiced the technique — now it’s time to put it all together. If your goal is silky smooth legs, the difference between frustration and success is consistency, the right tools, and smart aftercare.
Start with the essentials: hair at roughly 1/4–1/2 inch, skin exfoliated 1–2 days before, and a clean, dry surface on wax day. Use soft wax and strips for larger areas like legs, apply with the hair growth and remove quickly against it while holding the skin taut. Aftercare matters: calm the skin, avoid sun and hot baths for 24–48 hours, moisturize daily, and begin gentle exfoliation 2–3 days later to prevent ingrowns.
Small habits produce salon-worthy results at home — not miracles.
If you want a compact checklist for your next session, remember:
- Trim if hair is too long (trim to ~3/4 inch maximum).
- Exfoliate 48–24 hours before waxing, not right before.
- Choose soft wax for legs; heat to manufacturer specs.
- Remove strips fast and keep the skin taut.
- Soothe and hydrate post-wax; avoid strenuous activity and chlorine briefly.
A quick micro-summary: consistent prep + correct technique + diligent aftercare = lasting smoothness.
If you prefer more guidance or a professional touch, remember advanced in-clinic options exist. Amsterdam Beauty Clinic combines state-of-the-art technology with natural, vegan products to make hair removal more comfortable and effective — ideal if you’re ready to level up from DIY. For a deeper dive into technique and trends, consult this comprehensive resource on waxing.
You now have the knowledge to achieve and maintain silky smooth legs at home. Start with one confident, well-prepared session — iterate, learn what your skin prefers, and enjoy the results. When in doubt, seek professional advice to protect your skin and accelerate lasting smoothness.
Ready to achieve flawlessly smooth legs? Discover a range of professional waxing services and expert advice at Amsterdam Beauty Clinic.
People Also Ask
How long should my leg hair be for waxing?
For effective waxing, your leg hair should be approximately 1/4 to 1/2 inch long. If it’s too long, trim it down to about three-quarters of an inch to ensure the wax can grip it properly without causing excessive pulling.
What’s the best way to prepare my skin for at-home leg waxing?
Prepare your skin by exfoliating 1-2 days before waxing to remove dead skin cells and help the wax adhere better. Ensure your skin is clean and completely dry on the day of waxing, and avoid applying heavy lotions or oils right before the treatment.
Should I use soft wax or hard wax for my legs?
For larger areas like legs, soft wax with strips is generally recommended as it’s easier to apply and remove quickly. Hard wax is typically better suited for smaller, more sensitive areas of the body.
What are the most important steps for post-waxing care on legs?
After waxing, soothe your skin with a cool compress or a calming gel. Wear loose clothing made of natural fabrics and moisturize daily. Begin gentle exfoliation 2-3 days later to prevent ingrown hairs and maintain smoothness.
How can I prevent ingrown hairs after waxing my legs?
To prevent ingrown hairs, it’s crucial to moisturize your legs daily and start gentle exfoliation about 2-3 days after waxing. Consistent exfoliation helps to keep dead skin cells from blocking hair follicles, allowing hair to grow out smoothly.
What should I do if I have wax residue left on my legs?
If you have wax residue, use a post-depilatory oil or a baby oil to gently dissolve and remove it. Avoid using harsh soaps or scrubbing, as this can irritate your freshly waxed skin.